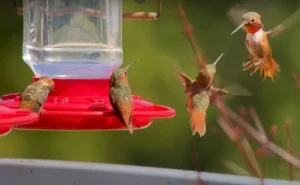
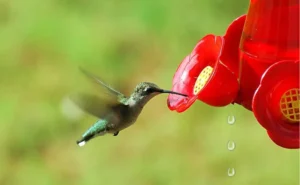
Hummingbird feeders are a source of vitality for hummingbirds in the yard. Cleaning of feeders is super important. Nevertheless, if you do not clean them, these little jewels may be in danger. It is essential to clean hummingbird feeders in order to ensure their well-being and to avoid the growth of mold and germs from damaging their health.
If you have a feeder it’s your responsibility to keep it clean and keep the food in there fresh. Now just think of what you’re putting in there; you’re putting a concentrated sugar solution and then you’re hanging it outside.
If you put a concentrated sugar solution in your refrigerator after a certain amount of time you can you know that molds fungus bacteria is growing in it and it’ll only keep a few days now. Dirty hummingbird feeders pose several concerns. Hummingbirds get poisoned by nectar mold. They can contract infections from dirty feeders.
So if you’re leaving your feeders up there for weeks and weeks without cleaning them. How do you clean them well first of all I clean my feeders every time I take them down and refill them which is sometimes a few times a day.
When you empty out a hummingbird feeder is first of all if you run your finger around you can see that the surfaces are a little bit slimy and that happens even after like half of the day. So, you need to clean the hummingbird feeders regularly to ensure the well-being of hummers.
I know this is quite a chore, but I know you’ll do it because you love your hummingbirds. I have 15 feeders in there so this takes quite a bit of work but I love those hummingbirds I want to keep them safe and I certainly don’t want them to get any infections.
Table of Contents
What You’ll Do
List of items
- Basin or plastic container
- Scrubbing brush
- Thin tube brush or flexible cleaning stick
- Soft fabric cloth
Matter to prepare:
- Bottle of filtered vinegar
- Lukewarm water
ProTip:
Too much sugar water in the feeder might ferment and damage hummingbirds. Sugar water should be changed every 2-3 days, especially in hot conditions. You must clean the feeder at least once a week with hot water and a brush or using a dilute bleach solution.
Hummingbird Feeder Cleaning Ways
1- General Cleaning Technique
Hummingbird feeders require regular cleaning so that any mold or gems don’t grow inside the feeder which can eventually harm hummers. Many people often ask about how to clean hummingbird feeders; no matter what type of feeder you have, just follow these steps for effective cleaning of feeders.
- Empty And Rinse
The first step of cleaning a hummingbird feeder begins by emptying any leftover nectar from it. Rinse the complete feeder thoroughly with clean hot water to get rid of any debris and sticky residue.
- Disassemble
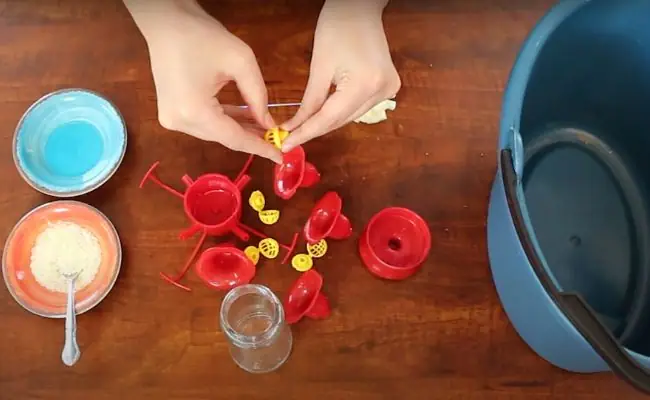
After you have cleaned the feeder, the second step is to separate the components of the feeder as much as possible. This includes separating the base, reservoir, feeding ports, perches, and any other components. Disassembling the feeder allows for better cleaning access for you.
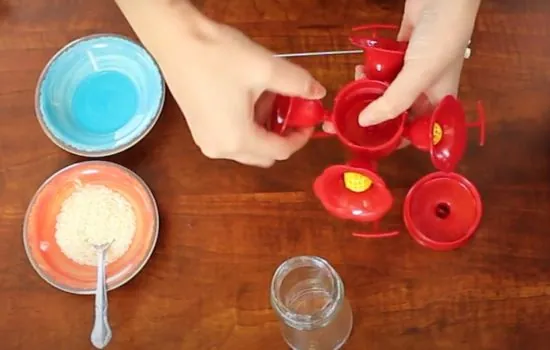
- Soak In Soapy Water
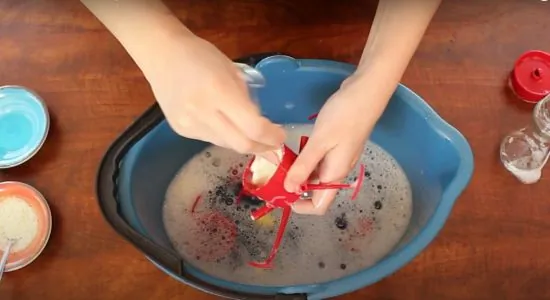
The third step is that I would suggest you to clean the feeder with soap water. To make soap water, put some light dish soap in a bowl or sink and fill it with warm water. Soak all the parts that have been taken apart for at least 10 to 15 minutes to get rid of any dirt that is still stuck on them.
- Scrub With A Small Brush
In the 4th step use a small brush like a toothbrush that can easily reach to small components of the feeder. Keep on scrubbing till all surfaces are visibly clean. I scrub mine with a bottle brush in extremely hot water, nearly every day lately because I have a dozen birds feeding now. You can also use a bottle brush to clean any dirt that is still present in the feeder. Keep in mind to make sure that your brush reaches into all the nooks and crannies.
- Air Dry And Refill
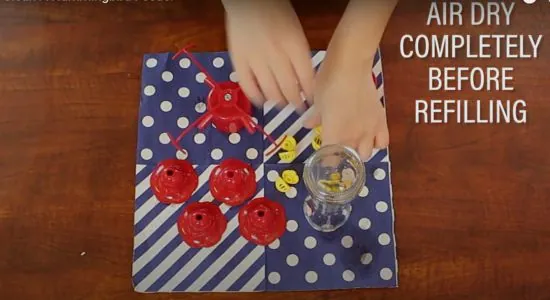
In the 5th step, you must let the feeder’s parts dry completely in the air before putting it back together. Make sure there is no more water left, since mold can grow in damp places. Refill the feeder with fresh nectar once it is completely dry. This is the easiest way to clean the hummingbird feeders.
2- Using Vinegar For Cleaning
Vinegar is a natural and effective cleaner that can help remove mold, bacteria, and other contaminants from the hummingbird feeder. Unlike other chemicals used for cleaning, vinegar is non-toxic when it is diluted.
This makes it much more safer for you and the environment. Vinegar is most accessible and budget-friendly choice for hummingbird enthusiasts. Vinegar has sterilizing qualities and can kill and sterilize most germs.
Solution
For a standard cleaning of the feeder, the ideal ratio is 1 part white vinegar to 4 parts water. This creates a potent yet gentle solution. If you have mold that won’t go away, you can change the mixture to 1:2 for more cleaning power, but make sure you rinse really well afterward.
Put the measured vinegar into the jar of your choice, then the water. Make sure everything is mixed well by giving it a good stir. Now that you have your homemade vinegar solution ready for cleaning, you’re one step closer to having a clean hummingbird feeder and ensuring a safe and secure environment for hummers. Here it the complete procedure for how to clean hummingbird feeders with vinegar:
Procedure
- Disassemble the feeder and empty all the nectar from it.
- After that, soak all disassembled parts of feeder in the vinegar solution and keep it in that solution for at least an hour or more if required.
- Use a brush to scrub the feeder and to remove any debris or residue.
- After scrubbing the feeder, it is time for rinsing it thoroughly with hot water and air-dry it.
- It is also important to wear gloves when handling or cleaning the feeder to prevent the spread of diseases
3- Bleach As A Cleaning Agent
One for the effective way to easily clean hummingbird feeders is bleach. Keep in mind, although cleaning hummingbird feeders with bleach is a very effective technique, it can be harmmful if you do not handle it carefully.
Bleach is a strong chemical that can irritate your eyes, skin, and lungs. When you handle it, you should always wear gloves and eye protection. Ensure proper ventilation when using bleach.
If you are not confident enough that you can handle bleach carefully, I would suggest you to pick other methods of cleaning the hummingbird feeder that I have already mentioned. But if you think you can handle bleach with care, believe me it is one of the most useful cleaning agent as it can clean feeder very easily and effectively.
Solution
Mix a solution of 1/4 cup of bleach per gallon of clean water. This concentration is effective for disinfection and cleaning the hummingbird feeder while still being on the safer side.
Procedure
- Disassemble the feeder and soak all parts in the bleach solution for no more than one hour.
- Use a brush to scrub away any contaminants.
- Rinse thoroughly with hot water and air-dry completely.
4-Clean With Hydrogen Peroxide
Keeping your hummingbird feeders sparkling clean isn’t just about aesthetics; it’s crucial for the health of these delicate feathered friends. There is a natural disinfectant known as hydrogen peroxide that may be used to remove mildew, germs, and dirt from your feeders in a method that is both friendly and effective.
Remember that consistency is the key! You must clean your hummingbird feeders with hydrogen peroxide at least once a week, especially during hot weather when bacteria growth is accelerated. If you are wondering how to clean hummingbird feeders with hydrogen peroxide, then follow the steps given below.
Solution
- In a large bowl or pot, combine equal parts 3% hydrogen peroxide and warm water. This diluted solution provides effective cleaning without harming the hummingbirds.
Procedure
- You’ll need 3% hydrogen peroxide which is available at most drugstores, warm water, a soft brush, and a clean dishcloth.
- Take apart all the feeder components, including the base, reservoir, feeding ports, and perches.
- Rinse each part with warm water to remove loose debris.
- Soak the parts in the hydrogen peroxide solution for at least 10 minutes. For stubborn mold or stains, extend the soaking time to 30 minutes.
- Use the soft brush to gently scrub the interior and exterior surfaces of each feeder part.
- Rinse all the parts with clean, running water to remove any residual hydrogen peroxide solution.
- Place the feeder parts on a drying rack to air dry completely.
- Once everything is dry, reassemble the feeder and fill it with fresh nectar solution.
5- Natural Cleaning
I know the importance of cleaning hummingbird feeders safely that’s why I always ditch the harsh chemicals and opt for a natural cleaning method using readily available ingredients. The lemon juice and baking soda are perfect natural cleaning kits for feeders.
This gentle yet effective approach removes mold, mineral deposits, and stubborn stains, ensuring the safety of my feathered friends. You can also use this to clean hummer feeders.
Solution
You should combine freshly squeezed lemon juice and baking soda to form a paste for scrubbing in your chosen container. This mixture should form a thick, spreadable paste. If it’s too runny, add more baking soda; if it’s too dry, add a touch more lemon juice.
Procedure
- Apply the paste to stubborn stains or deposits and scrub. Use your brush to generously apply the cleaning paste to all surfaces of the feeder.
- Rinse thoroughly with hot water.
- Allow all feeder parts to air dry completely before reassembling.
When to clean?
Many people ask me about how often to clean hummingbird feeders, it depends on whether the feeder is getting direct sunlight and how hot it is. In warmer weather, hummingbird feeders need to be cleaned more frequently to prevent the growth of bacteria and mold.
During the hottest months in Idaho, I usually clean my feeders every 1-2 days, and in cooler weather, I clean them slightly less often, like every 3-4 days. It is important to clean the feeder with dish soap and water after every fill, which is about every 48-72 hours, and let it soak in a bleach solution occasionally.
To clean the hummingbird feeder, I combine one quart of water and one-fourth cup of distilled white vinegar in a dishpan or sink. Mix the solution until it is completely dissolved. I use a bottle brush to gently clean the reservoir of the hummingbird feeder once it has been filled with the sugary solution then I perform a thorough rinsing with warm water.
Mold Prevention In Hummingbird Feeders
Identifying Mold Issues
Mold in hummingbird feeders is a serious concern, as it can harm and even kill the tiny birds. To prevent mold in hummingbird feeder it is necessary to identify the signs for mold, So here are a few key signs that I always look for:
- Discoloration: I observe the feeder closely to see if it has any black, brown, or green fuzzy patches on the body, flower ports, or bee guards. This is the most obvious sign of mold growth in the feeder..
- Cloudy nectar: I also check the nectar often, if the nectar appears cloudy or murky instead of clear, it might be spoiled and could be having mold.
- Unpleasant Odor: I have 4 window feeders that are attached to my bedroom’s window, and when there is an unpleasant odor around the feeder, I know that it is a clear indication of mold growth. If you notice any unusual smells around your feeders then it means that there is mold growth.
- Hummingbird Behavior Changes: Once I observed that there are over 4 dozen of hummingbirds in my backyard but I noticed that the hummers were not attracted to a particular feeder that was placed near my balcony and that feeder had mold on its feeding ports. The presence of mold might cause hummingbirds to avoid feeding at a feeder.
Cleaning Mold-Infested Feeders
It’s important to act quickly if you suspect mold in your feeder because When mold forms on the feeders hummingbirds eat from, their tongues swell and they can’t eat, so they starve, and starve to death.
If you do not know how to clean hummingbird feeders with mold then listen to me just follow the basic steps, here is how to clean a hummingbird feeder in 5 easy steps:
- Step-1: Empty and rinse, remove leftover nectar, rinse thoroughly with hot water.
- Step-2: Disassemble or separate all parts for better cleaning access.
- Step-3: Use a warm, soapy water solution to soak components for 10-15 minutes.
- Step-4: Use a bottle brush for narrow parts and a small brush for intricate areas.
- Step-5: Then, allow the feeder to air dry completely before refilling it with fresh nectar.
Make sure there is no sign of mold or black mildew. You can Consider using a feeder with fewer nooks and crannies for mold to hide in. To prevent mold, use only white sugar in the nectar, as other substances like honey can cause fungus to develop.
Clean Hummingbird Feeders Safely – Protecting Yourself And The Birds
When cleaning hummingbird feeders, it is important to take safety precautions to avoid harming the birds.
- Do not use soap to clean the feeder as it can leave residue. Instead, clean with a very dilute vinegar solution or a 10% bleach solution.
- Scrub the feeder thoroughly with hot water and rinse it completely.
- Protect your hands from potential bacteria and harmful mold spores by wearing gloves while cleaning.
- Don’t use abrasive cleaners; just stick to soft sponges or bottle brushes to avoid scratching the feeder’s surface.
- Aim to clean hummingbird feeders safely every 2-3 days, especially during hot weather when bacteria growth is faster.
- Discard unused sugar water after a few days and refill with fresh nectar.
Conclusion
Hummingbird feeders are vital to attract little jewels in the yard, but cleaning feeders is more important for their well-being. Neglecting cleanliness can lead to mold and bacteria growth, posing risks to their health.
Whether using vinegar, bleach, hydrogen peroxide, or natural solutions, following proper cleaning procedures is vital to provide a safe source of nectar. You must clean your feeder regularly if you even don’t see any signs of mold.
If you follow the steps to clean the hummingbird feeder, you can help keep your hummingbird feeder mold-free and provide a safe and healthy food source for these beautiful birds. You should hang the feeders in a strategic way carefully, and you can also check my comprehensive guide about the hummingbird feeder placement.

